The subscription recovery is a tool designed to recover subscription sales. This tool allows you to attempt to convert the subscribers that stopped continuing their subscriptions.
Installation
First, download the Subscription Recovery plugin from your Converslabs account. Then go to your WordPress dashboard and navigate to Plugins > Add Plugin > Upload Plugin. Click on Choose File, then Install Now, then click Activate. Subscription Recovery will be successfully installed on your site.
Features
The goal of the subscription recovery plugin is to try to convert your subscribers that no longer paying. Subscription Recovery plugin adds 3 main pages under the WPSubscription menu. They are Recovery Report, Campaign, and Email Template.
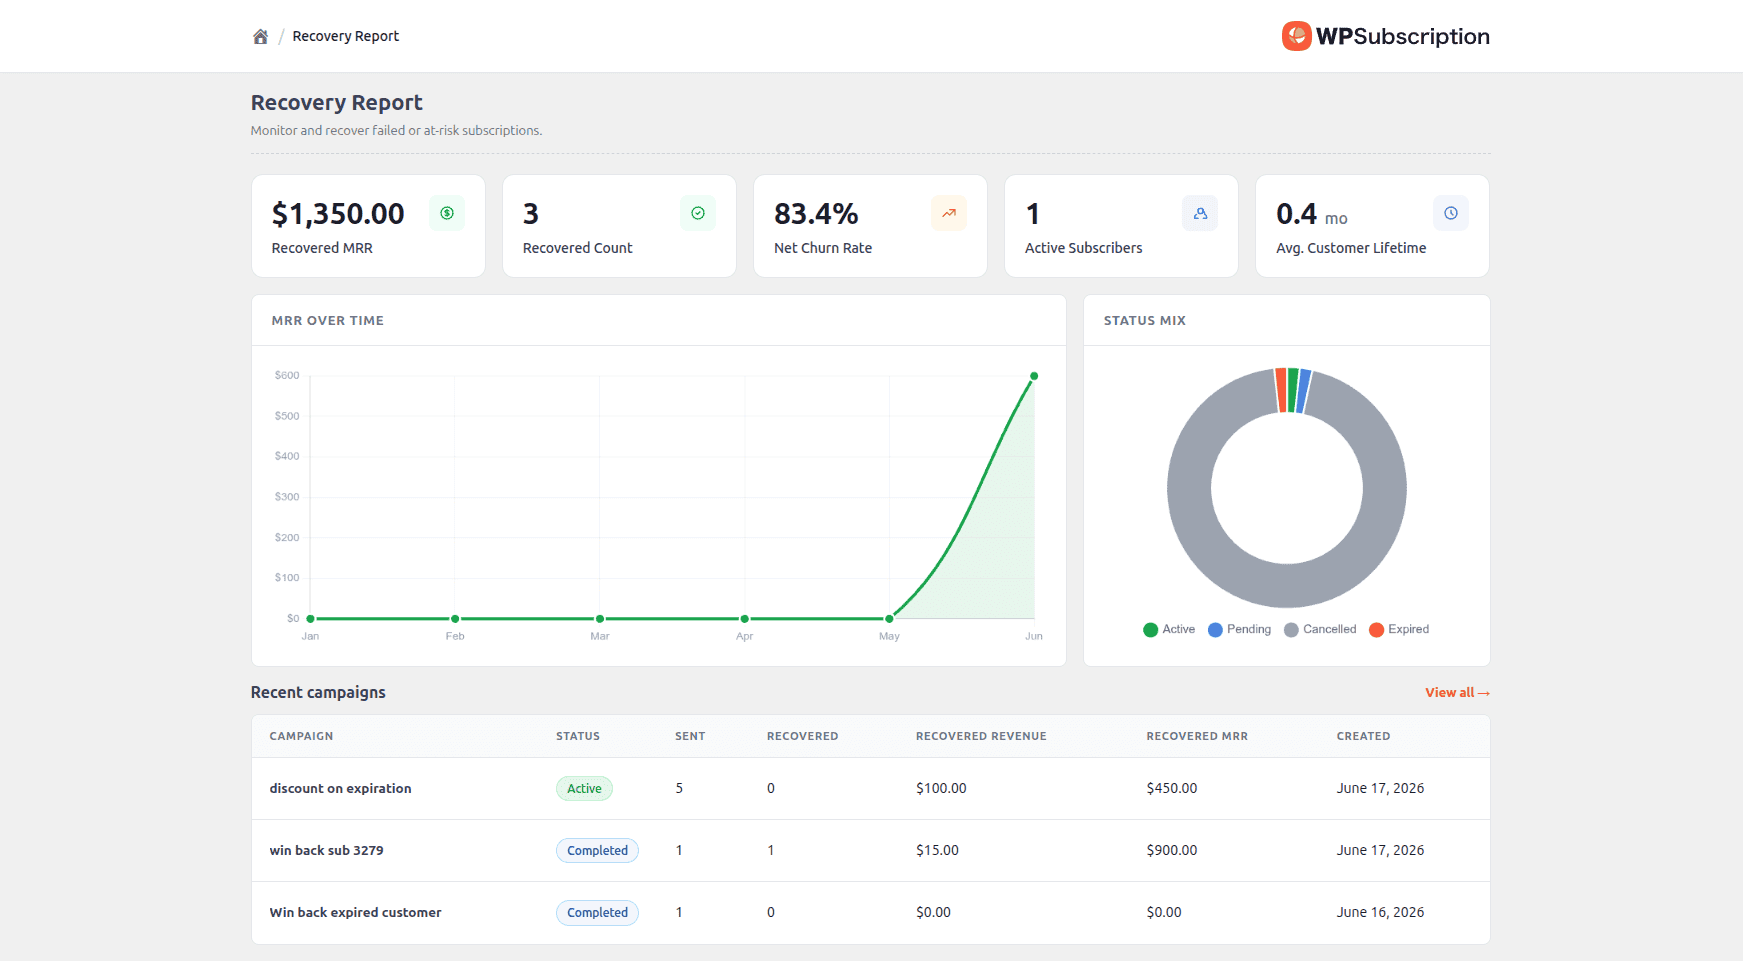
Recovery Report
This page contains an overview of the Recovered MRR, Recovered Count, Churn Rate, MRR Over time, etc. You can get a general understanding of your recovery campaigns from this page.
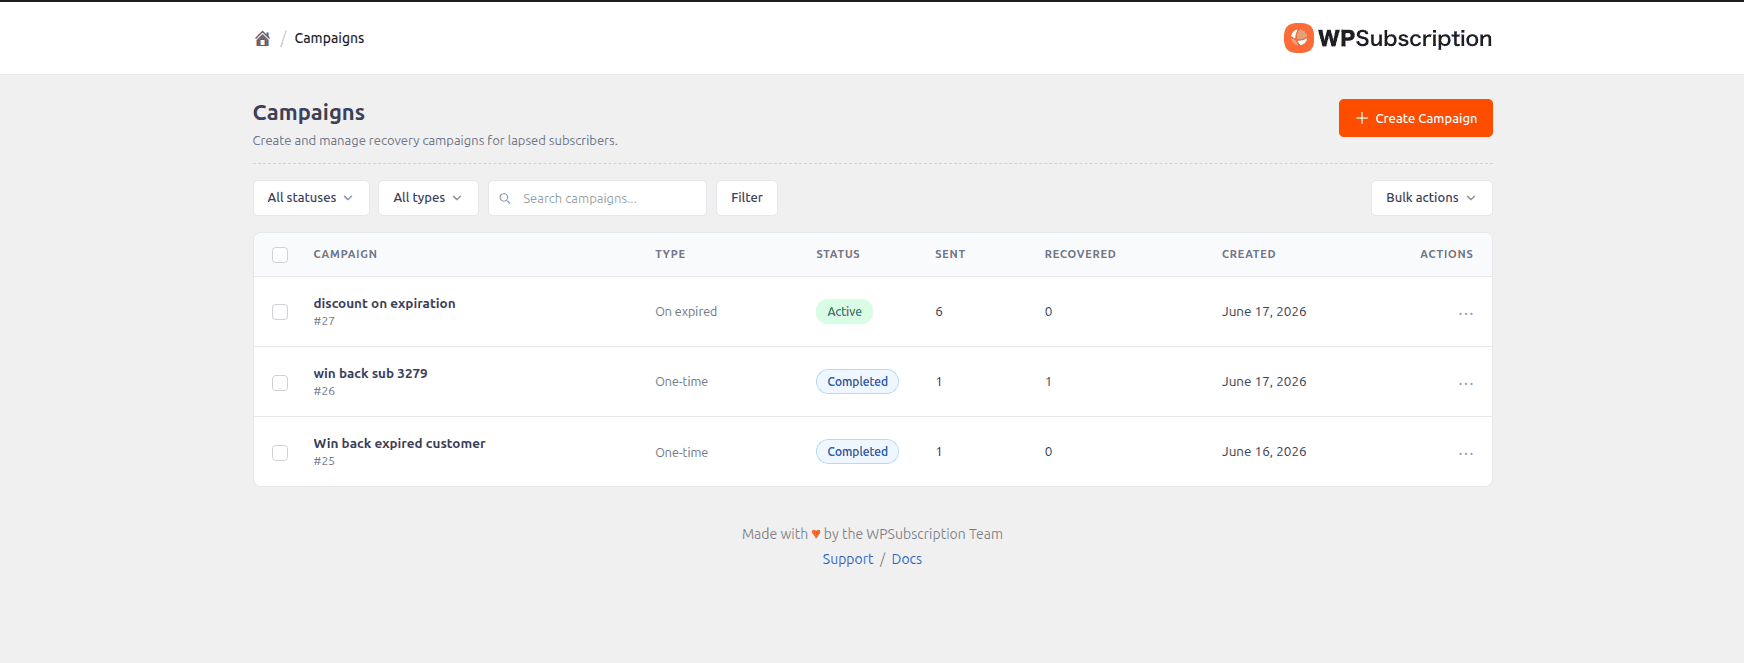
Campaign
You will create campaigns for recovery on this page. It lists the campaigns, shows details for each campaign, and creates/edits campaigns. You can send customized emails to your customers. You can also add a discount to a subscription for your subscribers.
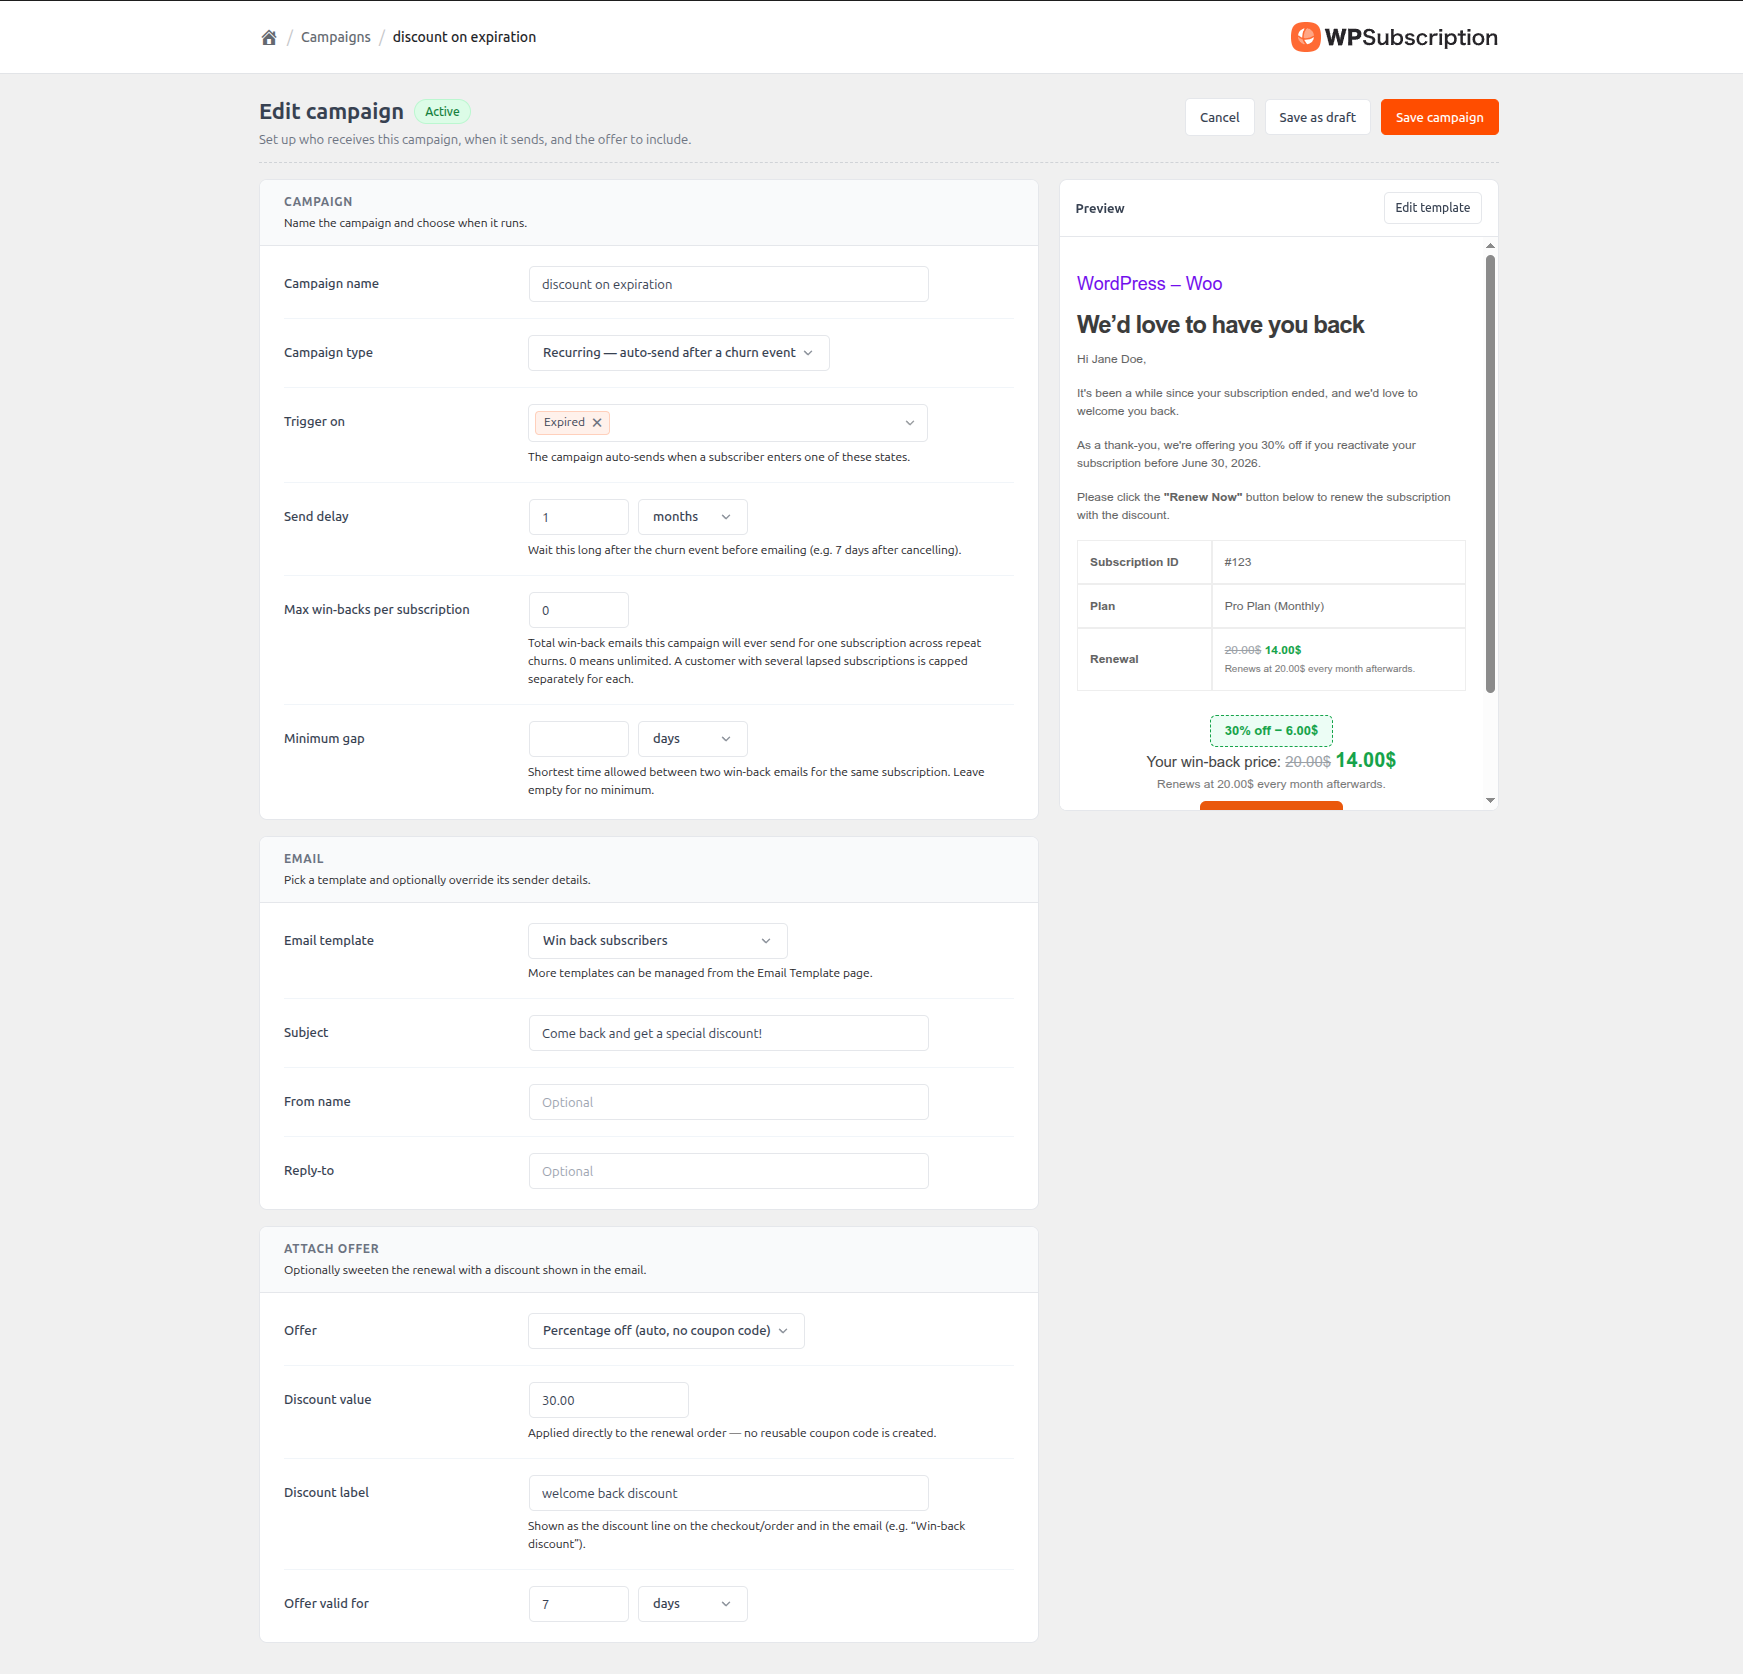
Creating a Campaign
To create a campaign, go to WPSubscription > Campaign > Create Campaign. You can create 3 different types of campaigns according to your needs. They are:
One-time: This campaign runs on the selected subscriptions once. You can optionally select the subscription product, subscription status, billing periods, and tenure.
Scheduled: This is like the One-time campaign. But you can schedule it to run on a specific date in the future.
Recurring: This campaign will run indefinitely based on the subscription status trigger. You can limit how much one discount one subscriber can get from the campaign, and the minimum gap a subscriber can be qualified for the auto discount.
Give a campaign name, then select your desired campaign type and fill in the required options on the screen. Some options will show/hide based on your selected campaign type. For example, the Send on option will only show if you select Scheduled in the campaign type.
Then select an email template for the campaign. There will be a default one already available. You can edit it or create an entirely new one from the Email Template page. You can optionally override the subject, from name, and reply to fields. Otherwise, they will use the default one from the template. You can view the email preview on the right side of the screen in real-time.
You can attach a discount to your email for that subscription. For this, you will need to select one of the options from the offer field. It offers 3 types of discounts.
Percent Off: A percentage discount applied to the subscription's next renewal.
Fixed amount: A flat discount applied to the subscription's next renewal.
WooCommerce coupon: You can attach an existing WooCommerce coupon to the subscription's next renewal.
Don't worry about abusing the discount. This discount is not reusable, and it can only be claimed from the email.
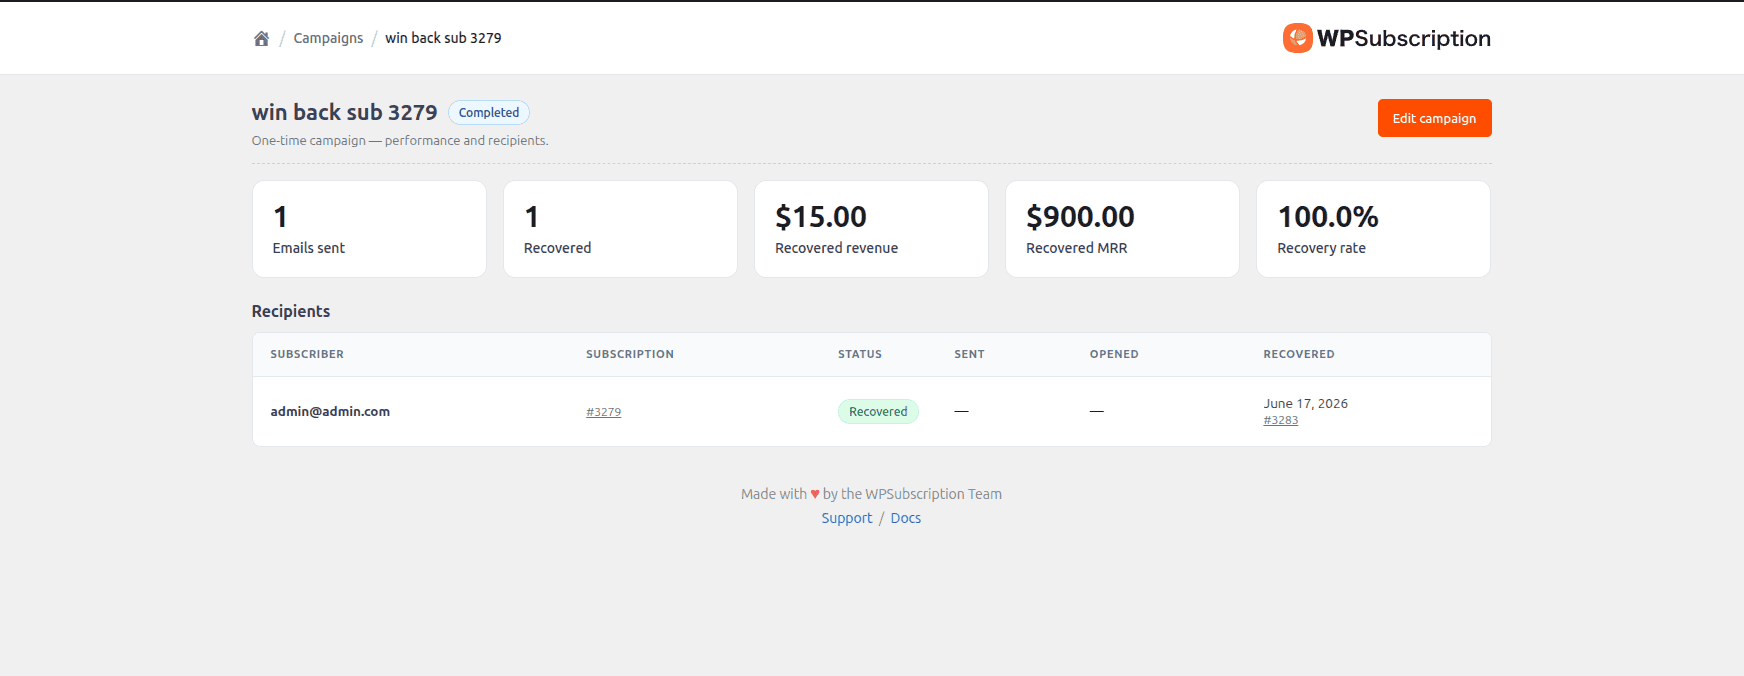
Campaign Details
You can see the outcome of a campaign on the campaign details page. It shows the number of emails sent, subscriptions recovered, recovered revenue, MRR, recovery rate, and the recipients' breakdown.
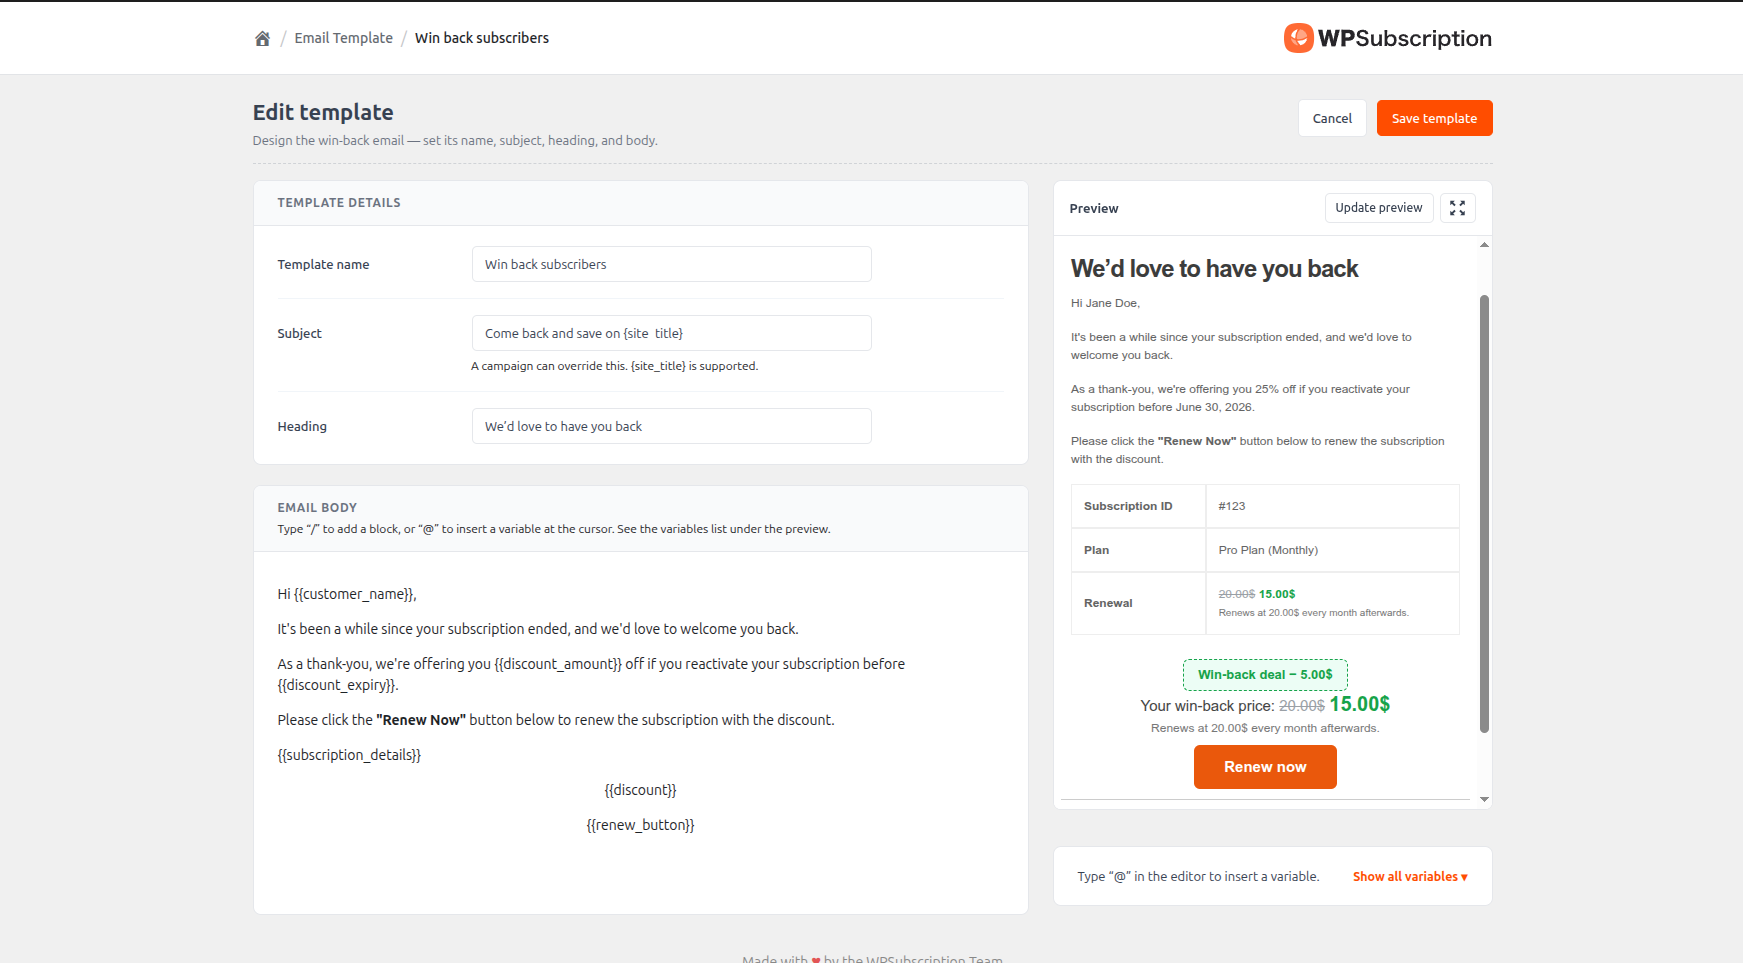
Email Template
You can create and edit emails for the campaign from here. When you go to the WPSubscription > Email Template, you will be able to see the list of available email templates. You can create new ones here.
To create a new template, click the Create Template button on this page. Fill in the template name, subject, and heading. The email body supports basic Gutenberg blocks. You can access them by clicking on the '+' icon at the end of the line or pressing '/'. You can also add subscription information with placeholder variables. Click '@' to trigger the variable list and pick one from it.
You can see the list of the variables on the right side of the screen. You will be able to see a live preview of the email on the right side of the screen.