Start accepting payments in minutes with 100% digital onboarding & feature-filled Razorpay payment gateway with the WooCommerce plugin.
To process subscription payments with Razorpay, you will need to install the Razorpay for WooCommerce plugin. Follow the steps below to install and configure Razorpay for your WooCommerce site.
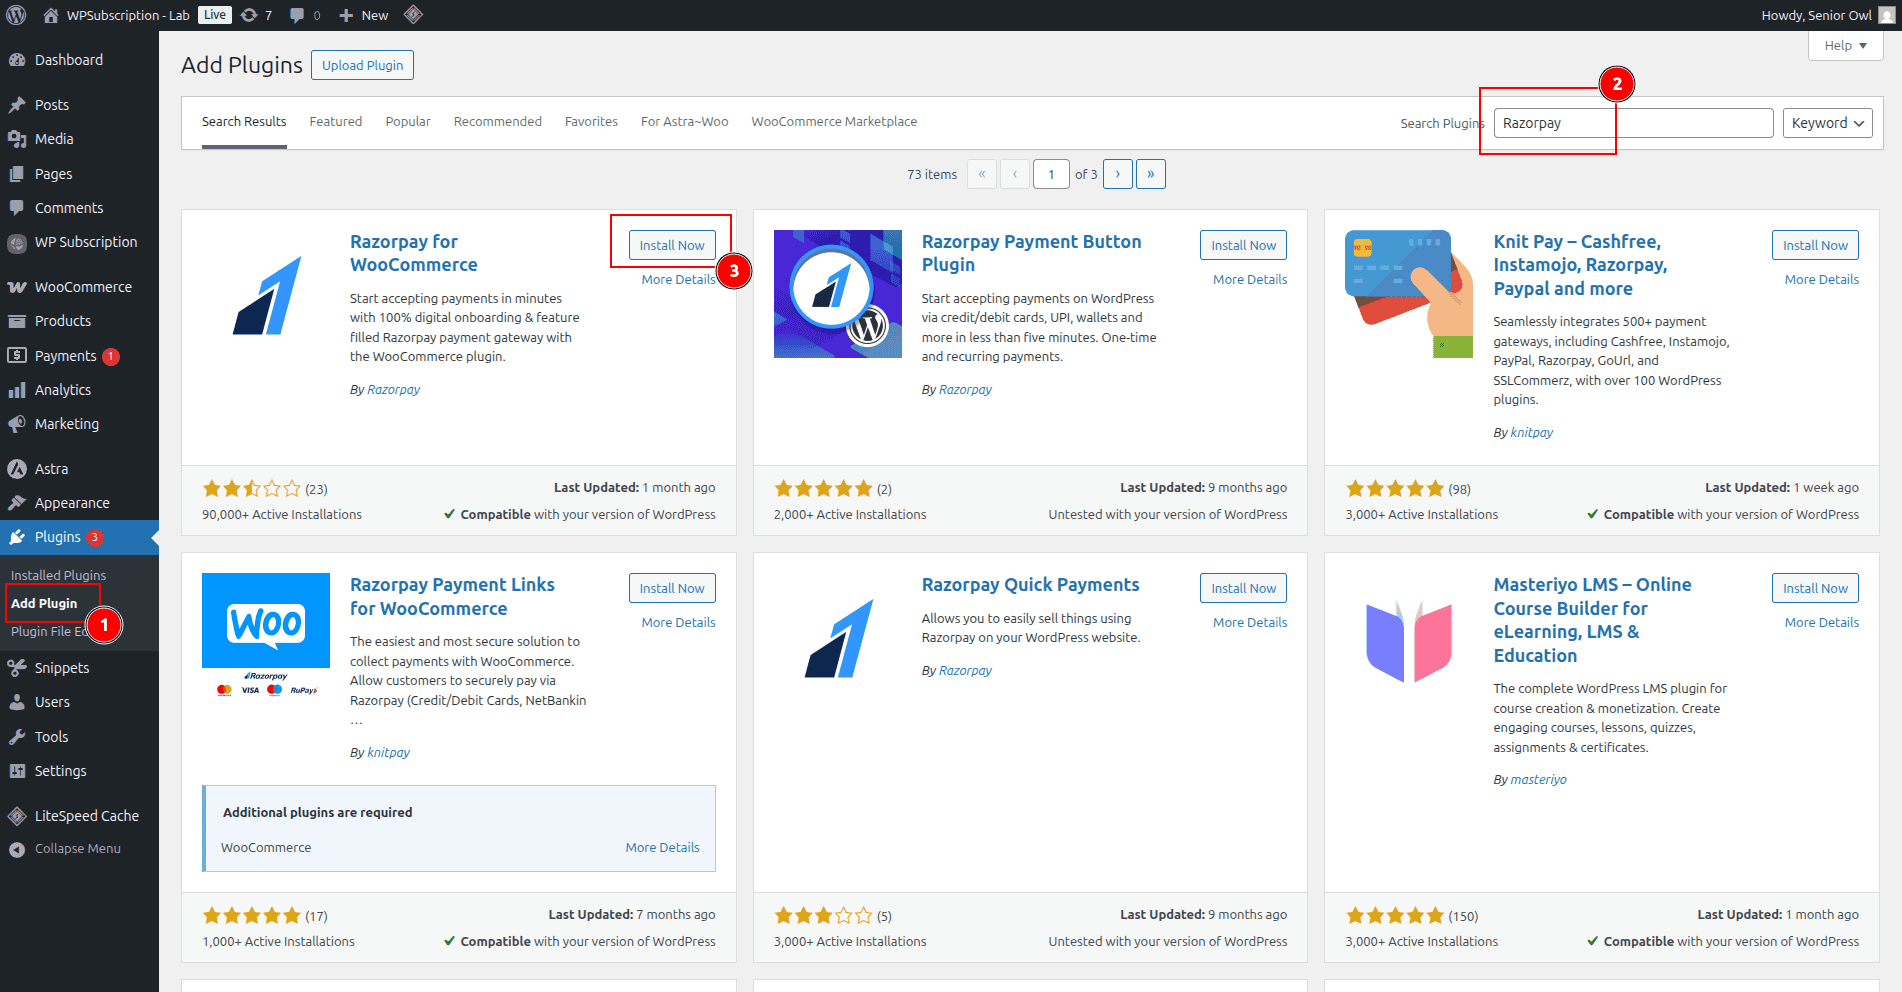
Install Razorpay
Log in to your WordPress admin.
Go to your WordPress admin dashboard.
Navigate to Plugins > Add New.
In the search bar, type Razorpay for WooCommerce.
Look for the plugin by Razorpay.
Click Install Now, then Activate once the installation is complete.
Get Credentials from Razorpay
Go to Razorpay Dashboard.
Go to Developers > API
Click Generate API Key
From the pop-up, copy Key ID and Key Secret. We will use these in WooCommerce settings.
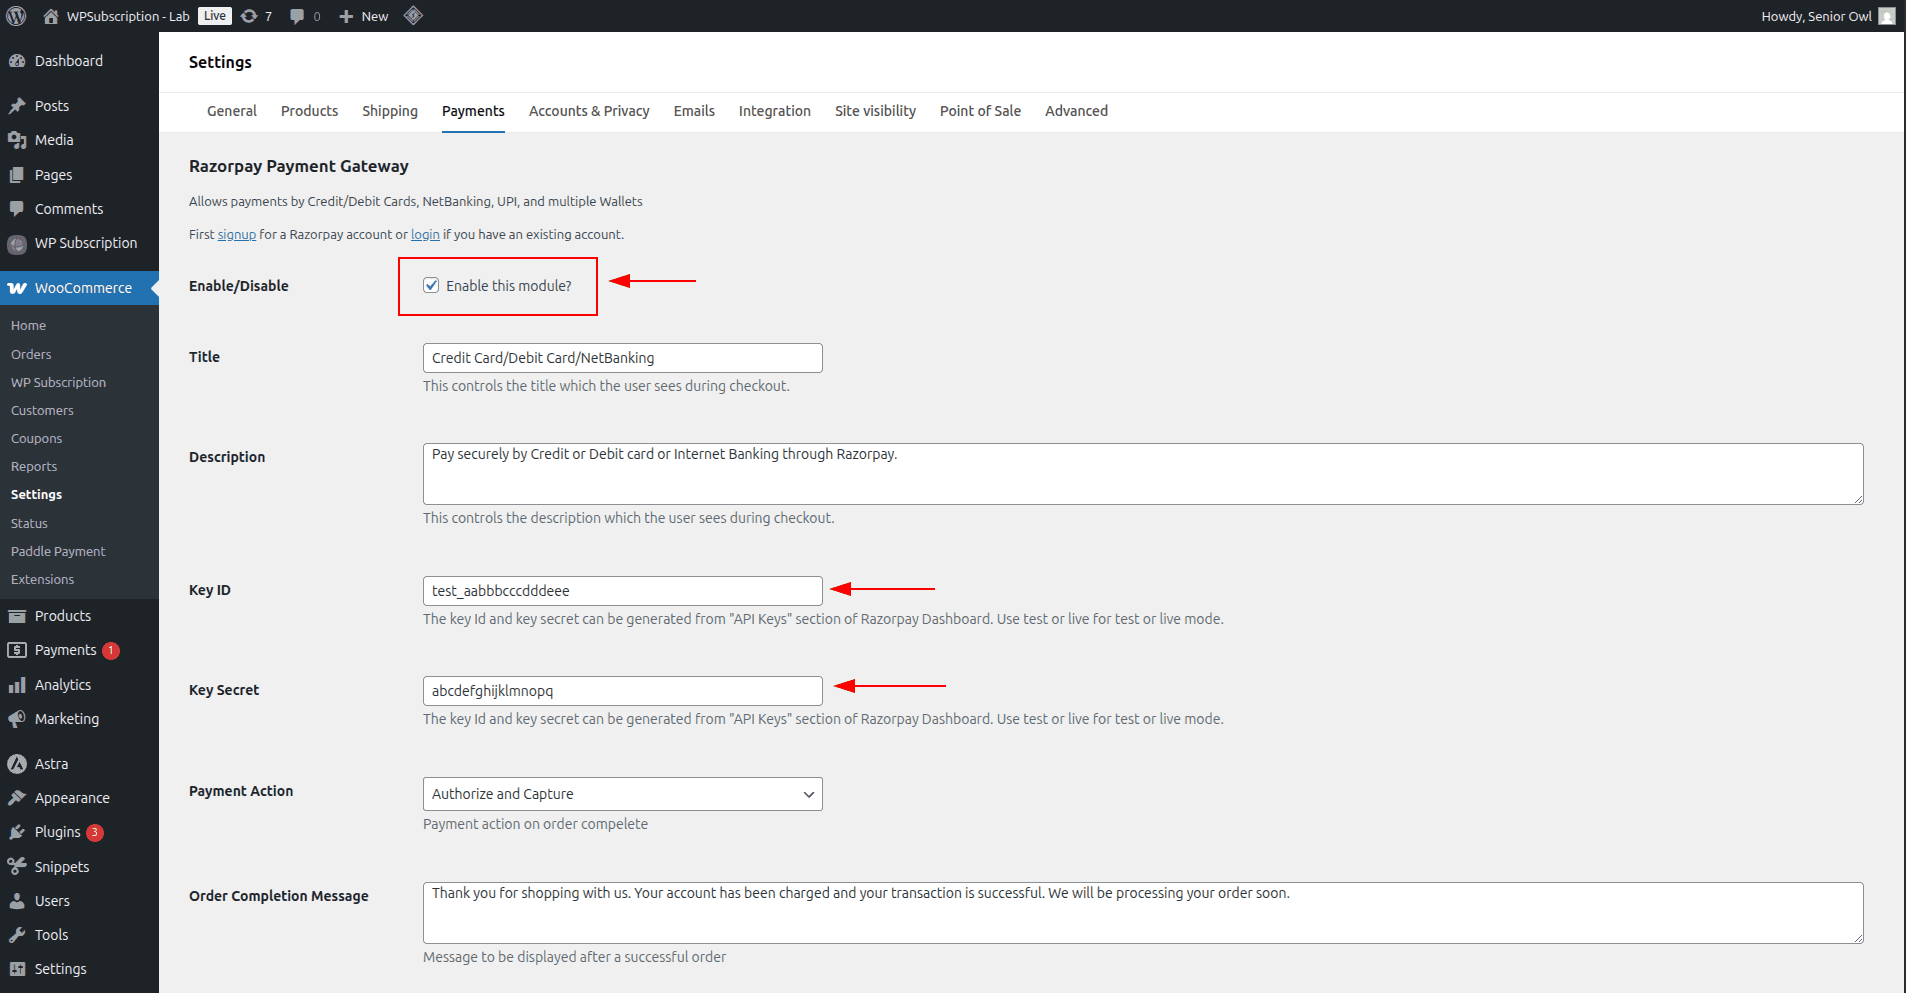
Connect Razorpay to WooCommerce
In the WordPress admin menu, go to WooCommerce > Settings > Payments.
Click Enable/Complete Setup in the Razorpay gateway.
Check Enable/Disable.
In the Key ID field, paste the Key ID copied from the Razorpay Dashboard.
In the Key Secret field, paste the Key Secret copied from the Razorpay Dashboard.
Click the Save changes button.